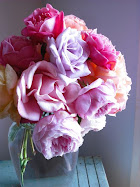
I started by making a pattern from the petals...You don't have to worry about this, because KingT copied it into a PDF pattern for you, click HERE . Thanks Hunny!
Materials needed:
printer, for pattern
Fabric, leather, suede, felt or heavy decorator fabric
Hot glue
scissors
pen
Your finished flower is going to be 4" across. I used an ink pen to transfer each pattern piece, twice. You will have six pieces total. 2 small, 2 medium and 2 large. Cut to the inside of you markings.
*Pre test the ink from your pen on a small piece of fabric, make sure it's not going to smudge while you're cutting the material.
Starting with the smallest pattern piece. Take a petal and add a small bit of hot glue to base and begin to roll. Work slow keeping neat and tidy with the glue, work in small increments. Your first petal will be a small tube, continue to wrap using the second petal. As you glue each petal, pinch the base to create a pucker in each one (photo further down in post) and so on, until you've completed all four.
Take your small tiny rosette and glue to the center of you second piece of Fabric, continue wrapping and glue the petals
Above is a photo of the rose from the outside, this has the first of the medium size petals attached. Here I hope you can see how I have been 'pinching' each petals as the glue cools.
Around and around until you have a completed rose. Here you can see the metal pin, just like my rose from Claire's.
That pin is actually a plant marker, cut, bent with needle nose pliers and the points sanded till they no longer caught in my hair.lol A small round piece of leather is glued over the end. I imagine you could easily glue on safety pin or broach jewelry finding.
My second rose (seen below) I glued onto yo-yo covered interfacing. Giving me a background that I can easily sew onto a hat.
Tomorrow, I'll be back with my hat!
A flower for my friends.


3 comments:
We gotta get you out there and "introduced"! Girl, you have uber talent!
Debbie
P.S. When I asked about shipping, I wasn't talking about ME making the frogs. I'm all thumbs when it comes to anything creative.
Wow, that´s great tutorial! I will try it. Thank you!
I have always wanted to know how to make leather roses, so I am thrilled that you posted this.
Thanks!
Post a Comment